IPinfo is now on the Pipedream platform. You can easily connect IPinfo to thousands of APIs, apps, and data sources with a few clicks of a button. By combining IPinfo’s data and Pipedream’s service, get IP data and insights without writing any code.
What is Pipedream
Pipedream is a no/low code platform that allows users to connect different APIs, applications, and data sources. Pipedream also includes the ability to use your favorite programming language to fine-tune the workflows you create.
Pipedream has thousands of data and API connectors that you can easily and quickly thread into creating a self-contained workflow. Pipedream has its own in-platform scheduler/cron, email actions, and hosting so it is a self-contained automation platform.
Pipedream has a vibrant community and a fantastic team behind it, so we at IPinfo are very happy to be a part of their platform, and to enable Pipedream users with IP information and insights.
How to use IPinfo on Pipedream
Before we get started, let’s get to know a few Pipedream-specific terms.
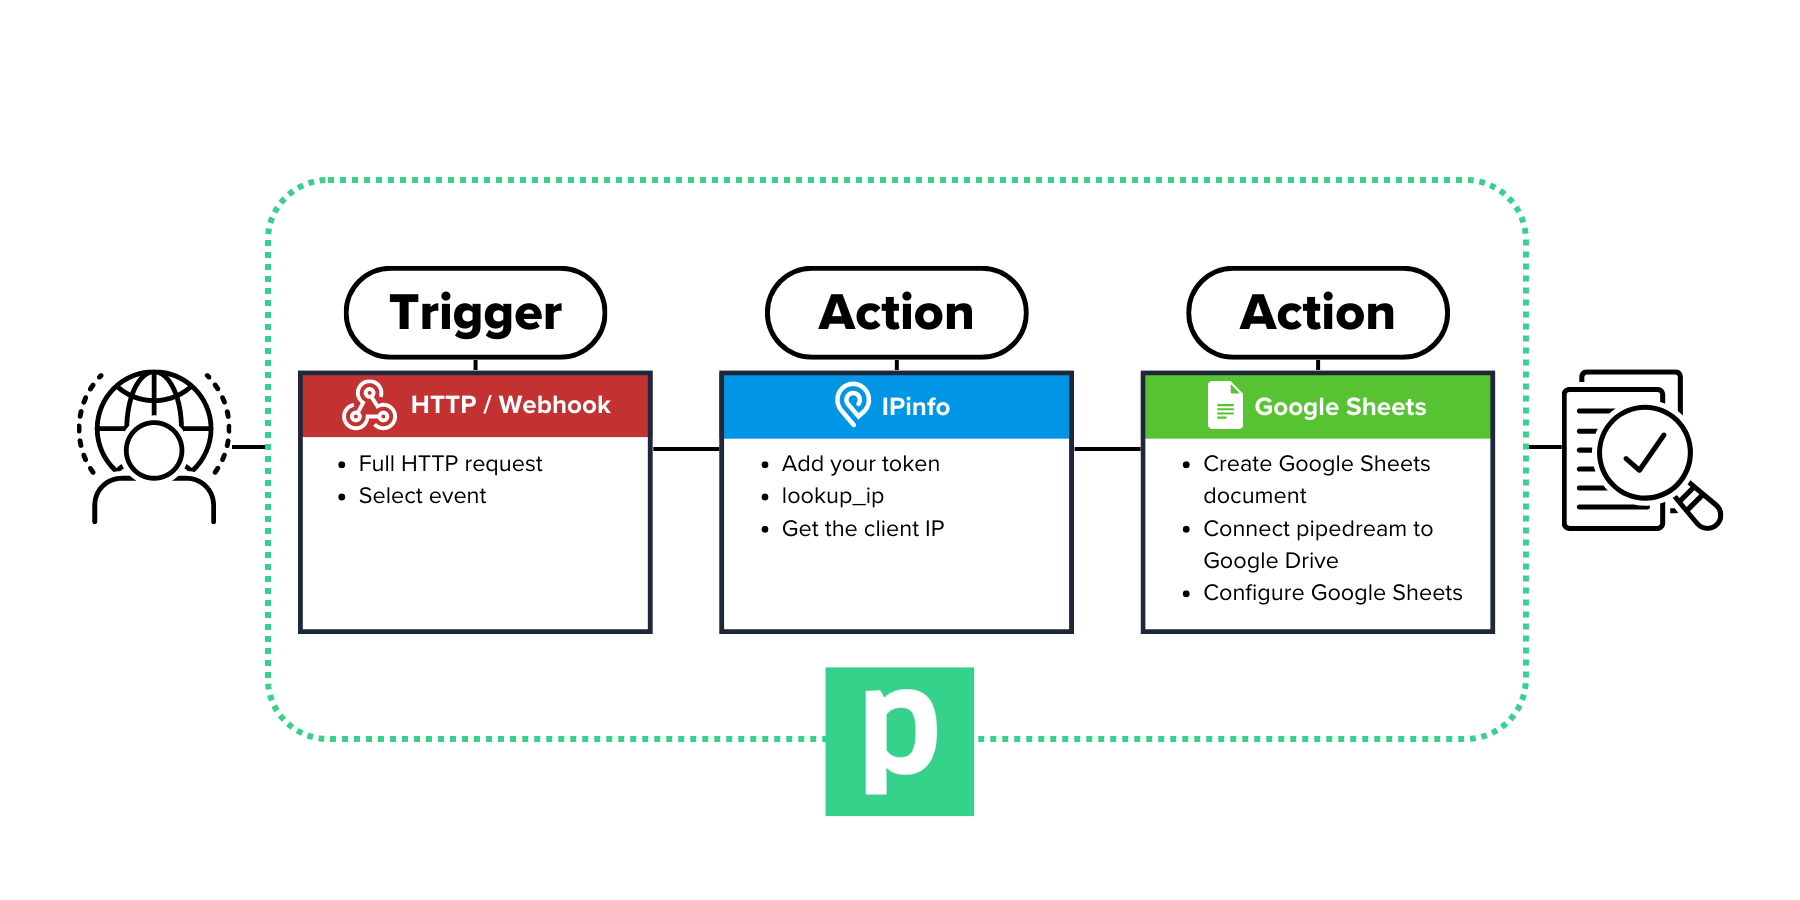
- Workflows: Workflows is a self-contained solution where you can add sequential steps as trigger and action events to achieve a goal.
- Trigger: The event that runs your workflow. In the workflow we created, the HTTP event is our trigger.
- Action: Actions are reusable steps to update, create or change data available within the workflow. In our workflow, we use IPinfo and Google Sheets app as our action step.
- Code: Pipedream allows you to write custom solutions or fine-tune your workflow with various programming languages.
To learn more about using Pipedream please visit their documentation page.
In Pipedream, IPinfo comes as an Action step. Currently, on the IPinfo app, we have two actions available:
- Lookup IP: Lookup IP information is based on our standard endpoint where you pass an IP address and we return geolocation, ASN, company, privacy detection, and other types of IP data. Visit our documentation to learn more.
- Lookup ASN: Lookup ASN information provides the data we have on the ASN. It takes an ASN value and returns organization name, allocation date, registry, IP ranges, etc. Check out the ASN lookup documentation to learn more.
If you would like to have more customization and additional features, please let us know.
Making an IP geolocation logger with Pipedream and IPinfo
An IP geolocation logger works like a web traffic utility but at a much smaller scale. An IP geolocation logger requires a unique URL. When anyone visits that URL, their IP address along with their IP geolocation information will be logged to a database or log.
With an IP geolocation logger, you can easily track and monitor traffic to your web application by embedding the URL to your site. You can also use it for OSINT (Open Source Intelligence) and traffic monitoring purposes as well. As this link can be easily embedded in forms and web pages, you can use it to ensure security and fairness in submissions and surveys.
Step 1: [Trigger] HTTP / Webhook
Get started by creating a workflow from your Pipedream account: https://pipedream.com/workflows

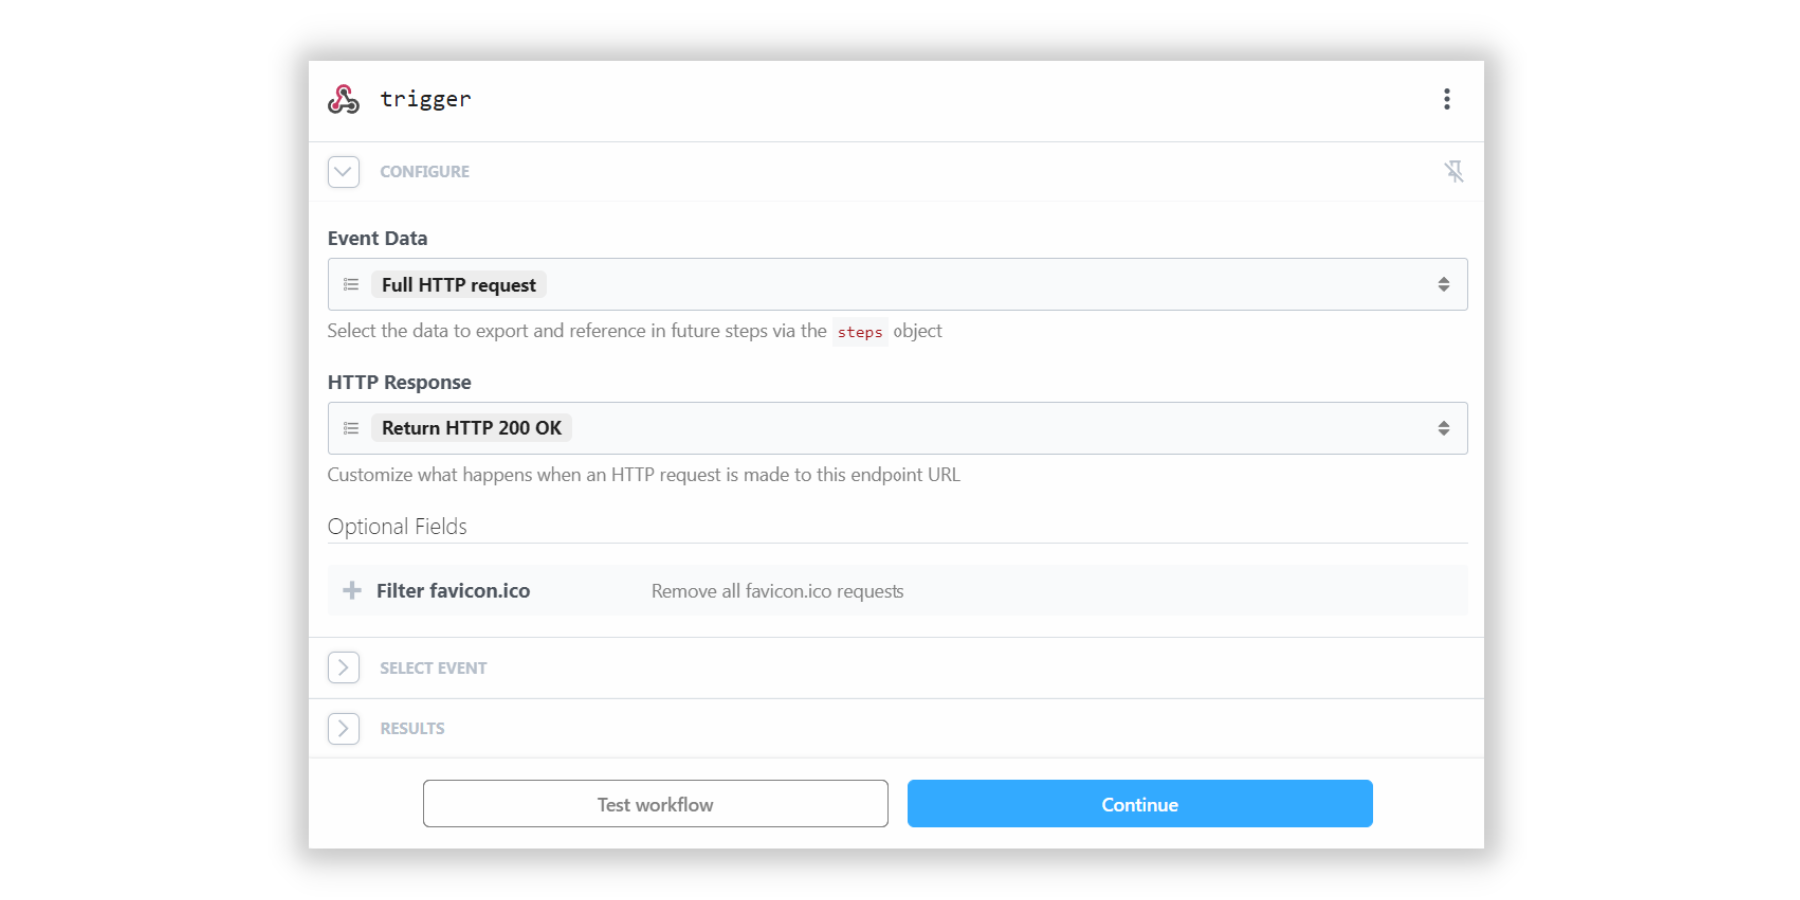
Then, from the list of triggers, select HTTP / Webhook. Then select “HTTP Requests”. After that, scroll down to Save and Continue.
This will generate a unique URL for you. This will be your IP logger URL. When a user visits or makes a GET request to this link, the visitor’s client IP information as well as HTTP header information will be captured. So, copy the URL and visit it from the browser. After you have visited the link, you will see an alert pop up.
Visit the Results section of the workflow, to see what we got. We have client's IP address and a bunch of HTTP header information. We will use the client_ip value to process it further using the IPinfo action, which will be used to fetch the geolocation and other IP information.
You can also create POST based HTTP request where you can pass the IP address as a text payload.
Step 2: [Action] IPinfo
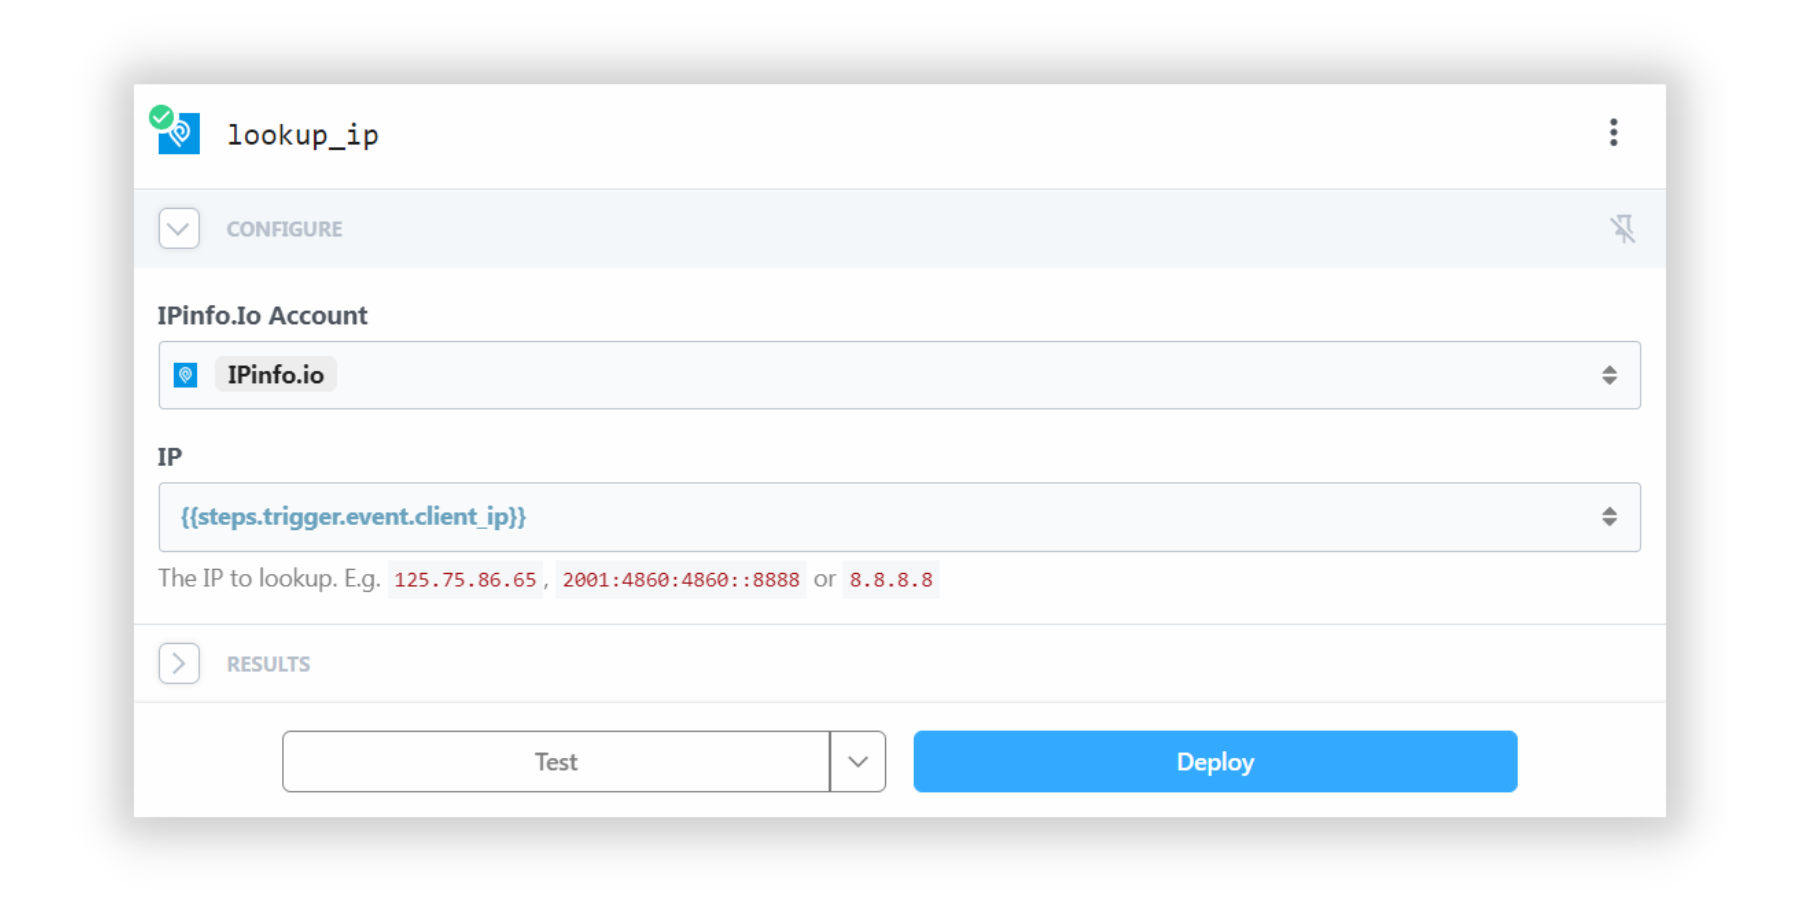
Now, that you have sorted out the request URL trigger, it’s time for you to process it using IPinfo’s action. Create a new node on your workflow, then search for IPinfo. After you have selected the IPinfo action, select the Lookup IP option from the prompt.
Now, click on the IPinfo.io Account field, then select “Connect New Account”. Here, you can pass the IPinfo account token you copied from your account dashboard. If you don’t have an IPinfo account, feel free to sign up. On the free tier alone, we provide up to 50,000 requests per month.
After you have passed your IPinfo token information, provide the IP address information field. You can select the field that contains the client's IP data. In this case, it is {{steps.trigger.event.client_ip}}.
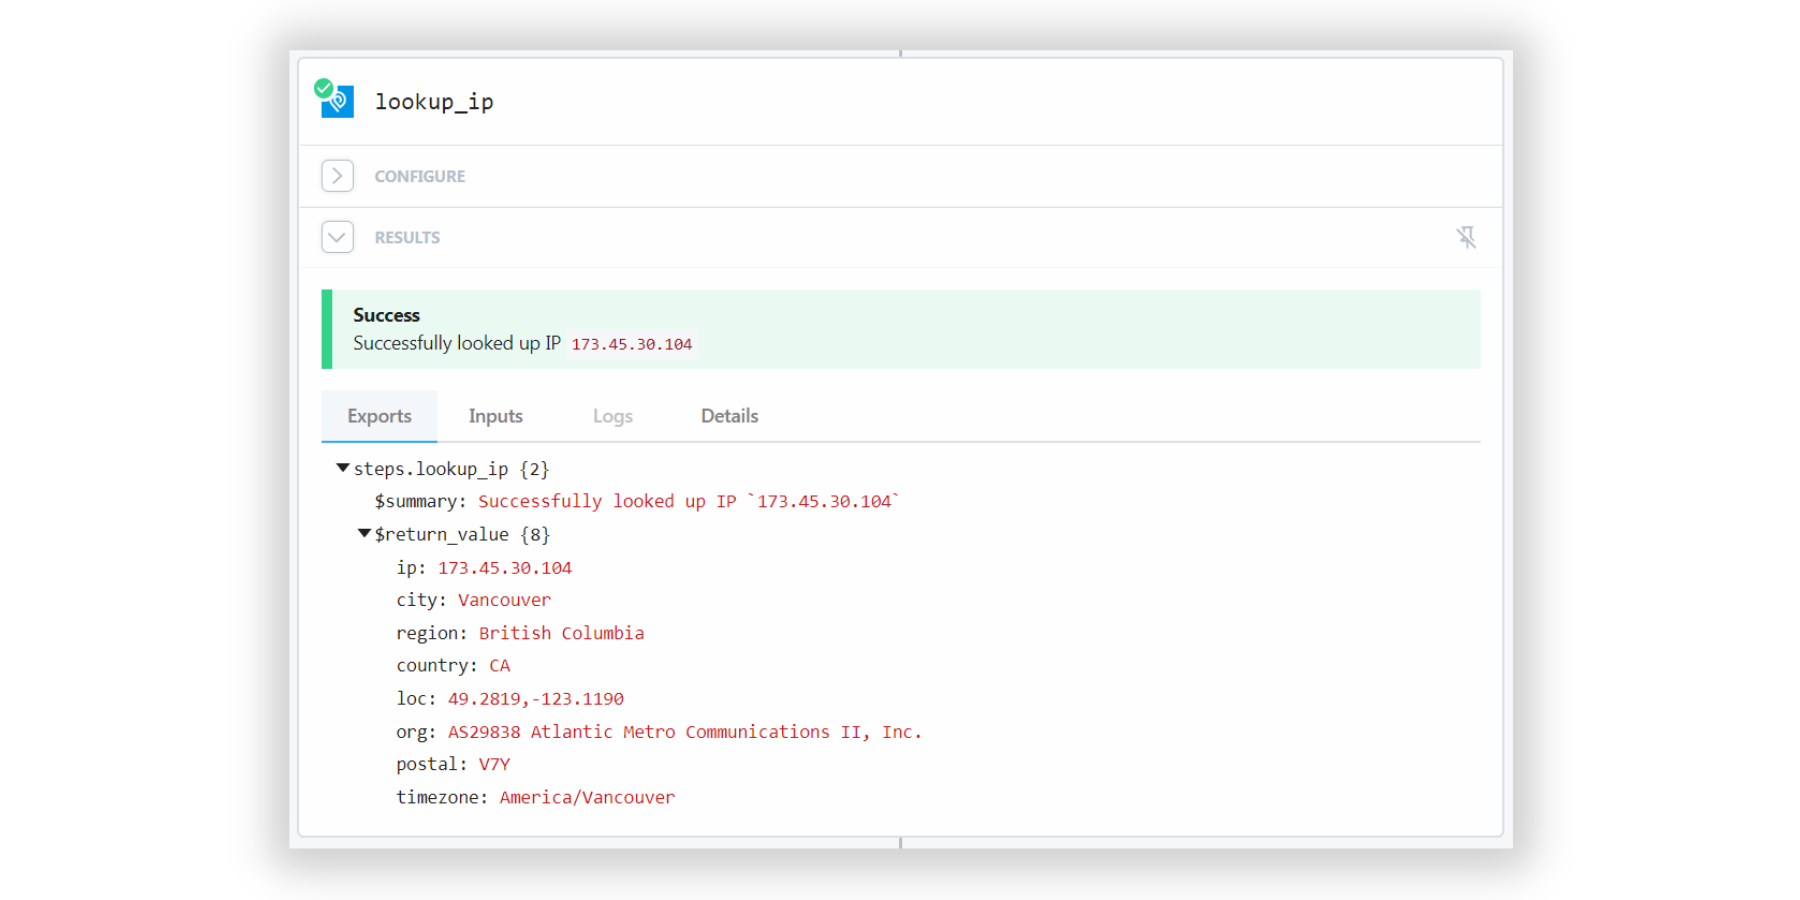
Once you are done, you can test the workflow and see if you are getting IPinfo geolocation correctly.
Step 3: [Action] Google Sheets
Now, comes the Google Sheets part, which will be used as a database of your web traffic information.
First, get started by creating a Google Sheets document in your Google Drive account. You can choose any google account you want. Make sure to give the Google Sheets document a name so you can find it easily. On the Google Sheets document, add the following columns on the first row:
- ip
- city
- region
- country
- loc
- org
- postal
- timezone
These are fields that are provided with our free tier service. If you are using a paid tier service, you will have access to more data such as VPN/Privacy detection, ASN information, IP to company data, abuse contact information, etc.
Now, come back to Pipedream. Add another node under the IPinfo action node. Then search and select “Google Sheets”. Once selected, you will need to provide your Google Drive access to Pipedream. You have to checkmark all the access requirements to get started.
After you have provided the authorization, look for the Google Sheets document you just prepared. Then select the sheet that contains all the information, the default for which is Sheet1. Then on the form "Does the first row of the sheet have headers?” select “Yes” as we just did that.
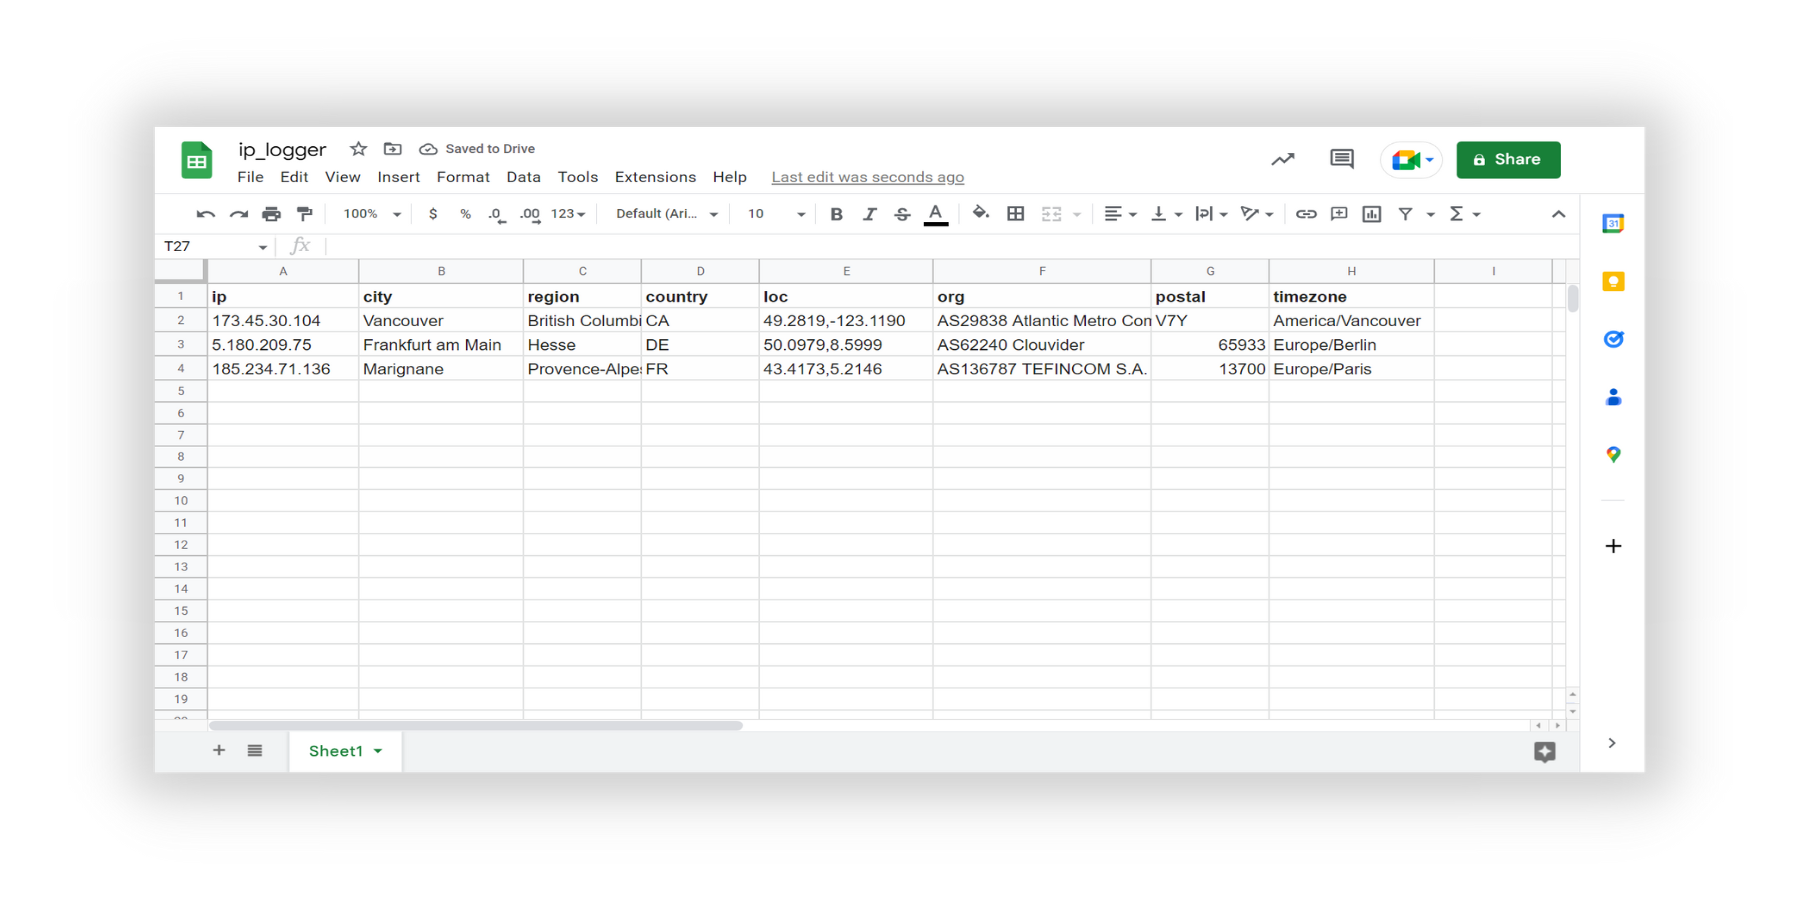
One by one, add all the values for each column. It should be fairly easy as each column value is {{steps.lookup_ip.$return_value.<column_name}}. Then, once you are done, test the action.
You will see Pipedream populate the Google Sheet document’s row with the client IP address and its values.
Step 4: [Deploy] Final Step
Now that every action and trigger are set up, you can click on the “Deploy” button and the top right corner and your workflow will be deployed.
And every time anyone visits your IP logger URL, their IP address and geolocation information will be logged in your Google Sheets document.
Since you’re now familiar with IPinfo’s app with Pipedream, feel free to create your own workflows, such as:
- HTTP + IPinfo IP Lookup + Email: Get email alerts with IP information if someone visits a specific link.
- HTTPS (POST) + IPinfo: If you are using a static website, you can post the client’s IP address to the Pipedream workflow and log the IP information to Google Sheets or in a database.
- Slack + IPinfo: Create a slack bot that gives IP information from IP addresses. This is especially useful in cybersecurity, system/IT administration, and OSINT.
- Discord + IPinfo: Discord bot that provides IP information from IP address inputs.
- Google Sheets + IPinfo: If you have a list of IP addresses on a Google Sheet, you can easily get IP information from them.
Pipedream is a fantastic platform to build incredibly useful workflows. With IPinfo’s services on the platform, you can enrich your IP log data and traffic data without any friction. If you have any questions about using IPinfo in Pipedream, feel free to reach out to us.